
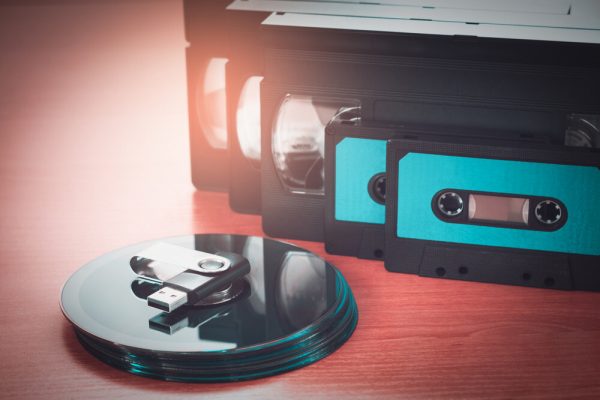
Remember those family vacation videos from the ’90s? Or that old VHS tape of your favorite movie, which you can’t even watch because your VCR is broken? And no store sells them anymore. Or the tape has collected too much dust to even be playable!
Those memories are too precious to let them fade away, collecting dust on a shelf. But what if we told you that you could preserve those moments and bring them into the digital age? We’ll show you how to convert your old VHS tapes into digital files so that you can watch them online or on a mobile device without having to worry about damaging the original.
What Are VHS Tapes?
VHS, or Video Home System, is an analog video recording format that was popular from the late 1970s until the early 2000s. The format used magnetic tape to record both video and audio, which was then played back using a VCR (Video Cassette Recorder).
VHS tapes were the primary medium for home movies, TV shows, and movies, but they have since been replaced by digital formats like DVDs, Blu-rays, and online streaming.
Why Do I Need to Convert My Old VHS Tapes?
There are several good and important reasons for opting for VHS transfer services to convert your old VHS tapes to DVDs:
- Preservation: The quality of VHS tapes deteriorates over time, and eventually they become unplayable. Converting them to digital files ensures that you’ll be able to watch them for years on modern devices.
- Convenience: Once you’ve converted your VHS tapes, you’ll be able to watch them whenever and wherever you want — on your computer at home or on a smartphone during a trip. Sharing it with your loved ones and friends is also so much easier!
- Space-saving: By converting your old VHS tapes to digital files, you’ll free up valuable storage space in your home, making room for new memories.
Equipment Needed for DIY Conversion
Converting tapes isn’t a very straightforward process but certainly doable. To convert your old VHS tapes into digital files, you’ll need a few pieces of equipment:
- VCR: A working VCR is essential for playing back your tapes. If you no longer have one, you can often find them at thrift stores or online marketplaces.
- Capture Device: A capture device is used to transfer the video and audio from your VCR to your computer. There are numerous best VHS converter options available, like the Elgato Video Capture or the Diamond VC500. Be sure to choose one that’s compatible with your computer’s operating system.
- Computer: You’ll need a computer with sufficient processing power and storage to handle the video files. Get the appropriate software for capturing and editing the video, such as Adobe Premiere or Final Cut Pro.
- Audio/Video Cables: You need RCA cables to connect your VCR to the capture device. Most capture devices come with these cables, but if not, you can easily find them online or at your local electronics store.
- Blank DVDs or External Hard Drive: If you wish to store your converted videos on physical media, you’ll need blank DVDs. You can also save them onto an external hard drive for extra portability, or just directly onto your computer.
Step-By-Step Guide to DIY Conversion
Ready to tackle the VHS-to-digital conversion process yourself? We’ll walk you through the process, providing clear and straightforward instructions to help you bring your old VHS memories into the digital realm.
You’ll see that with a few handy tools and a dash of patience, transforming those treasured VHS memories into digital gold is a breeze. Let’s get started, shall we?
- Connect the VCR to the capture device using the RCA cables. Make sure the video (yellow), audio left (white), and audio right (red) cables are correctly plugged into their corresponding ports.
- Plug the capture device into your computer using the provided USB cable.
- Turn on your VCR and put the VHS tape you want to convert into the slot.
- Launch the video capture software on your computer. The software should recognize your capture device and display a live video feed from the VCR.
- Adjust the settings in the software to your desired output format and resolution. You may also need to adjust the audio levels to ensure the sound is clear and balanced.
- Begin playing the VHS tape on your VCR, then click the “Record” button in the software to start capturing the video.
- Once the video has finished playing, stop the recording and save the digital file to your desired location on your computer.
- This is completely optional but you can use video editing software to trim, enhance, or add effects to your newly digitized video as desired.
- If you wish to store your video on a DVD or external hard drive, transfer the file accordingly.
Saving Your Memories!
It’s a pity to just toss out your old VHS tapes when they have great potential. If you have the time, resources and the ability to learn, then it’s definitely worth the time and investment to transfer your old VHS tapes to digital format.
By following these simple DIY conversion tips and investing in the best VHS converter options, you can ensure that your precious moments are never lost. But if you prefer an easier option, look into availing of professional digital conversion services.
Capture is one of the best options as a company with the necessary expertise. The important thing is to salvage those moments that mean so much to you and your family. So, dust off those old tapes and start bringing your memories back to life!